Motivation
When blogging online, it is possible that the same article needs to be uploaded to different platforms. For example, some articles will be placed on this website as well as in the README of the project’s GitHub repository. At this time, if the pictures in the article use local pictures, you need to put a copy on different platforms, which is not easy to update and manage in a unified manner.Hence the idea of building a personal drawing bed To unify the idea of managing these pictures.
Use the private picture bed, and directly insert the link of the picture in the private picture bed when writing an article to quote the picture, which is convenient for unified management in the future.
Prerequisites
- docker and docker compose
- Domain name (secondary domain name is enough)
- acme.sh (to generate SSL certificate)
- nginx (reverse proxy)
For the installation and preparation of the above software and tools, please refer to “Building a Personal Cloud Network Disk using Nextcloud and Docker”
Install Chevereto
Configure docker-compose
Since we have generated the SSL certificate and configured nginx above, we only need to configure Chevereto in docker.
Here I have created a separate partition on the hard disk of the server as the installation root directory of Chevereto.Create docker-compose.yml file in the root directory of Chevereto installation, write the following content:
|
|
Here you need to change “MYSQL_ROOT_PASSSWORD” and “MYSQL_PASSWORD” to the database password you set yourself, and you can also change the names of “MYSQL_DATABASE” and “MYSQL_USER”.
Build containers with docker-compose
Execute the following command in the Nextcloud installation root directory to build the container:
|
|
Domain Certificates and Reverse Proxy
Generate a free domain name certificate with acme.sh
The specific process can be found inHow This Website Was Built 2 – Hugo Framework for Personal Blog Website。
The main steps are as follows:
-
Generate the certificate using the following command:
1acme.sh --issue --dns dns_ali -d your.domain.name -
Use the following command to copy the certificate to your nextcloud directory. For example, I created a new folder
certin the nextcloud installation directory to store the certificate file:1 2 3acme.sh --install-cert -d your.domain.name \ --key-file your_cert_path/key.pem \ --fullchain-file your_cert_path/cert.pem
Set up a reverse proxy with nginx
Create a new configuration file nextcloud.conf in the configuration directory of nginx as the reverse proxy configuration file of the cloud network disk, write in the file:
|
|
Here I use port 8810 as the service port of Chevereto, and limit users to upload files up to 100 M.The SSL certificate is stored in the location specified in the previous step.
After the configuration is complete, restart the nginx service to make the changes take effect:
|
|
Initialization and Subsequent Setup
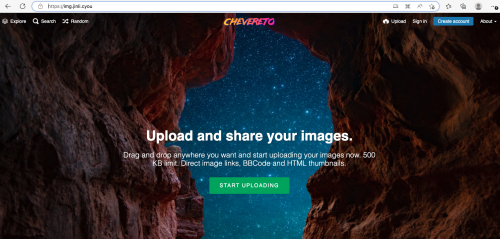
After completing the above steps, you can access your private picture bed from the browser!Enter the URL of the picture bed in the browser, for example, mine is https://img.jinli.cyou.You will enter the following page:
I forgot whether I need to do additional settings when entering this page for the first time, but it should be easy to complete as long as you follow the prompts.
Then follow the prompts to create a user name and password, and you can log in!